
We’ve all experienced it – someone stepping a little too close for comfort, invading our personal space when we need a breather, or even embracing without asking. YUCK!
Did you know your dog can feel the same way? They do, but they don’t have the words to express it. Instead, they rely on body language and subtle signals to tell us when they’re feeling crowded or disrespected.
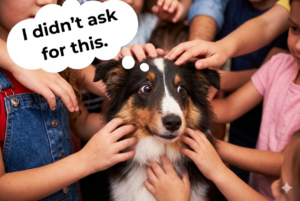
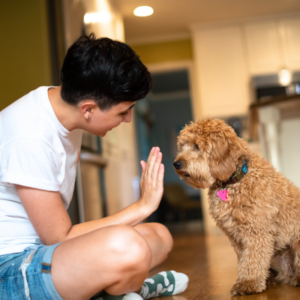
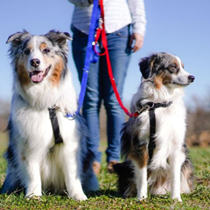
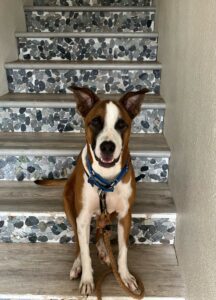
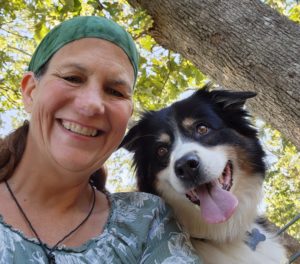
Oops! These wide eyes and tight mouth are clues this dog could use a break.
Just like humans, dogs have personal space needs. They may love cuddles and pets, but not always – and not from everyone. Whether it’s kids pulling at their fur, strangers swooping in for a pat, or even other dogs getting a little too pushy, dogs can feel overwhelmed when their space is invaded. Dogs can’t verbally say “back off,” but they give plenty of signals to communicate their need for space.
How Dogs Say “I Need Space”
Dogs are masters of non-verbal communication, and they often give clear cues when they’re feeling uncomfortable. Here are some signs to watch for:
- Turning their head or body away: This is like a polite way of saying, “I’m not into this right now.”
- Yawning or licking their lips: Not always a sign of tiredness, dogs yawn or display “tongue flicks” when they’re feeling anxious or uneasy.
- Ears back or tail tucked: These are signs that your dog is feeling stressed or scared.
- Moving away or hiding: If a dog is physically trying to get out of a situation, it’s a clear sign they want out.
When dogs give these signals, they’re asking for space and showing that they don’t feel comfortable. If we ignore these signs, we risk making them more anxious, or even causing them to react defensively, meaning: Look out! They may bite! And before you think, “Not my dog”, realize that even the nicest among us can be pushed to a point where we’d lash out to defend ourselves.
The Importance of Consent: Building Trust
Respecting your dog’s boundaries is not just about avoiding stress; it’s also about building trust. When a dog knows that you’ll respect their space, they feel safer and more confident. Just like in human relationships, trust is built when we listen and respect each other’s needs.
One way to practice this is by offering your dog choices. Before letting someone pet or play with them, see if they will come to that person first. Do they lean in for affection, or do they stay back? If they move away, that’s their way of saying, “Not right now.” This simple act of giving your dog a choice reinforces the idea that their feelings matter. You should do the same for other dogs you meet – give them a choice and see if they’ll come to you when you invite them.
The “Consent Test”: A Fun Way to Respect Your Dog’s Space
Here’s a fun and easy way to teach both kids and adults to respect a dog’s boundaries: the “Consent Test.” Before touching the dog, simply ask them with your actions:
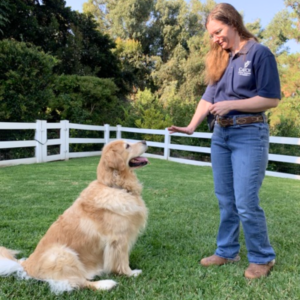
Turn sideways, pat your leg and call to them.
- If they move closer, lean in or nuzzle, they’re giving you a green light.
- If they turn away or show any of the signals we mentioned earlier, it’s time to give them some space.
When someone asks to pet your dog, say, “Let’s ask the dog,” and invite your friend to turn sideways, pat their leg and call your dog. If the dog is into them, she’ll go say hi. If not, respect her decision and say, “aww, I guess she’s not up for it right now.”
Respecting Boundaries Strengthens Bonds
When we respect dogs’ personal space, we build stronger, healthier relationships with them. A dog that knows their needs are understood is more likely to feel secure and less likely to develop stress-related behaviors. Just like humans, dogs thrive when they feel heard and safe. By paying attention to their signals, giving them choices, and respecting their boundaries, we create an environment where they know they are understood and supported. And who wouldn’t want that kind of relationship with their dog?
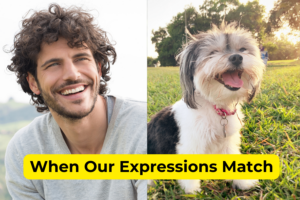 Ever wonder what your dog’s facial expressions mean? Spoiler alert: It’s not always ‘I need a treat.’ Just like us, dogs use their faces to communicate a wide range of emotions. While their fur and different features might make it harder to decipher than human expressions, there are some telltale signs that can clue us into what they’re feeling.
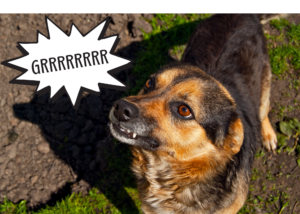
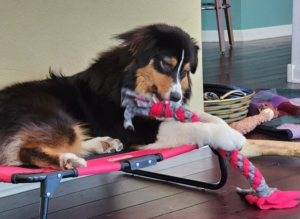
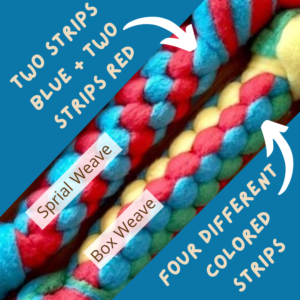 With the holidays coming up, maybe you want to make your dog an extra special gift with your own hands? And hey, if you make more than one, you could turn it into a donation for shelter dogs… either way, we have an awesome DIY project for you! These hardy fleece rope toys are the BEST for tug games.
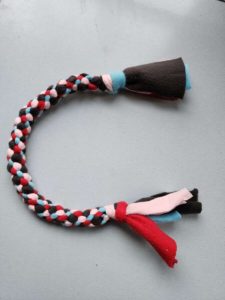
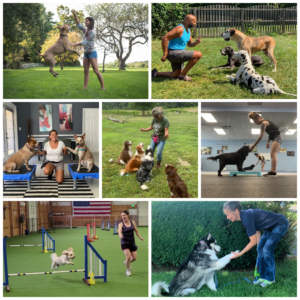 We want to send out a big congratulations and a Thank You to so many of the students and mentors who have shared great stories with us so far this year. We are thrilled for your success!
 “My name is Ariel Ebaugh (Arie for short) and I graduated from CATCH Academy in August 2020. I wanted to share some exciting news about my life this past year since finishing my program. After graduating, I opened my private, in-home dog training business (Pups Unleashed, LLC) and haven’t looked back! I have absolutely loved working with clients using only rewarding, force-free methods supported by science. I also have spent hundreds of hours this past year training with at-risk dogs at a local animal shelter.
 “Hello from a 2020 CATCH Master Class graduate who also earned her CPDT-KA creds this Spring, thanks to your comprehensive program! I really enjoyed it!” -Maria S., CCDT, Master Class Graduate